Shower leaks are a homeowner’s nightmare. They often start small—just a bit of water where it shouldn’t be. But over time, they can evolve into serious problems, damaging walls, floors, and ceilings. At Delta Plumbers, we’ve seen it all—from hidden pipe leaks to faulty valves—and we’re here to help you understand why shower leaks happen, how to find the source, and most importantly, how to fix them.
This guide dives deep into the top causes of shower leaks, DIY repair tips, professional solutions, and what you can do to prevent future issues. Whether you’re a homeowner or a landlord in Ontario, this comprehensive blog is for you.

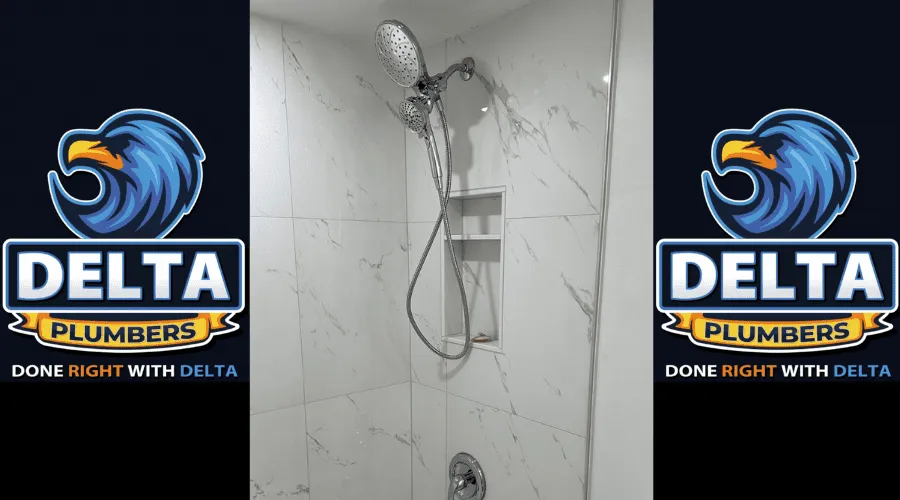
Picture Source – Delta Plumbers
What Is the Most Common Cause of Shower Leaks?
The most common causes of shower leaks stem from wear and tear, poor installation, and aging materials. Here are the key culprits:
1. Cracked or Missing Grout and Caulk
Grout and caulk act as your shower’s waterproof seal. Over time, exposure to water, soap, and heat causes these materials to deteriorate. Cracks or gaps allow water to seep through to the walls or flooring, leading to mould, mildew, or structural damage.
2. Leaking Shower Faucet or Valve
Behind every shower handle is a faucet or valve system that regulates water flow and temperature. If internal components such as washers, cartridges, or O-rings wear out, water can leak inside the wall cavity, causing unseen water damage.
3. Faulty Shower Pan or Base
A poorly installed or damaged shower pan is a common issue, especially in older homes. If the pan is not sealed correctly or has cracks, water can escape beneath the tiles or base, leading to rotting subfloors.
4. Plumbing Pipe Leaks Behind the Wall
Over time, pipes connected to your shower may loosen, crack, or corrode. Since these are typically hidden, such leaks may go unnoticed until you find water stains on the ceiling below.
5. Damaged or Loose Shower Doors and Tracks
Improperly sealed or misaligned shower doors allow water to escape onto your bathroom floor. Worn-out door sweeps or faulty hinges often contribute to this issue.
Also Read: Common DIY Plumbing Mistakes That Cost You More

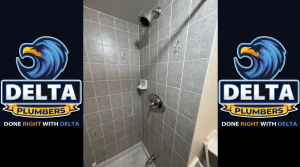
Picture Source – Delta Plumbers
How Do I Stop My Shower from Leaking?
Stopping a leaking shower involves identifying the source and applying the appropriate fix. Here’s a step-by-step approach:
1. Inspect Seals and Caulking
Remove old caulk using a utility knife or scraper, clean the area thoroughly, and apply a high-quality waterproof silicone caulk. This seals joints around the tub, shower base, and wall edges.
2. Repair Grout Between Tiles
If grout is cracked or missing, remove the damaged area with a grout saw and reapply waterproof grout. Allow it to dry thoroughly before using the shower again.
3. Replace or Repair Shower Faucet
Turn off the water supply and remove the handle and trim to access the valve. Depending on the model, you may need to replace a cartridge, O-ring, or washer.
4. Test and Tighten Plumbing Connections
Check access panels or remove nearby drywall to inspect the plumbing behind the wall. Look for corrosion or loose fittings and tighten or replace as needed.
5. Check Shower Drain for Leaks
Pour water directly into the drain area to test for leaks. If the drain is leaking, you may need to reseal it with plumber’s putty or install a new gasket.
6. Use a Shower Curtain or Door Liner Properly
Ensure that your curtain or door closes tightly and is directed inward during use to prevent water from splashing out.
Also Read: How to Tell if You Need a Drain Pipe Replacement

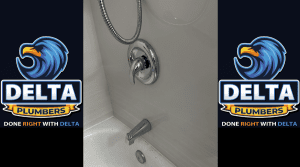
Picture Source – Delta Plumbers
What Causes the Shower Handle to Leak?
A leaking shower handle is usually due to internal damage or wear within the faucet assembly.
1. Worn Cartridges or Washers
Inside the faucet handle is a cartridge or stem valve that controls water flow. With time, rubber seals wear down, causing water to drip from the handle even when it’s turned off.
Fix: Shut off the water, disassemble the handle, and replace the cartridge or washer.
2. Loose Packing Nut
The packing nut secures the stem of the valve. If it becomes loose, water can seep around it, leaking from the handle base.
Fix: Tighten the packing nut with an adjustable wrench. If the leak persists, replace the washer beneath it.
3. Corrosion or Mineral Build-Up
In areas with hard water, mineral deposits can corrode faucet components, causing poor seals and leaks.
Fix: Soak parts in vinegar to remove deposits or replace corroded parts.
Also Read: Bathroom Plumbing Upgrades That Add Real Value to Your Home

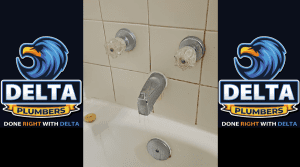
Picture Source – Delta Plumbers
Why Does My Shower Leak When in Use?
If your shower only leaks when it’s actively running, the issue is likely tied to drainage or water flow.
1. Water Escaping from Gaps in Tiles or Caulk
When water hits the walls or floor, it may enter small gaps in tile joints or old caulk, especially in corners or around fixtures.
2. Leaky Shower Arm or Head
If water drips from the wall when the shower is running, it may be due to a loose shower arm connection behind the wall.
Fix: Remove the showerhead and shower arm, apply Teflon tape, and reinstall them tightly.
3. Faulty Drain Connection
Your drain assembly may be poorly sealed or cracked, leading to leaks only when water flows through the system.
Fix: Remove the drain cover, check for leaks, and reseal using plumber’s putty or replace the drain gasket.
4. Overflow from Shower Pan or Poor Slope
Water that pools and doesn’t drain properly can overflow or seep under tiles. Improper sloping toward the drain causes this.
Also Read: Prepare Your Plumbing for Ontario’s Summer Storms
Picture Source – Delta Plumbers
How to Find the Source of a Shower Leak?
Identifying the origin of a shower leak can be tricky. Use the following methods:
1. Visual Inspection
Look for signs such as:
- Peeling paint or wallpaper
- Musty smell
- Warped or discoloured drywall
- Soft or spongy flooring near the shower
2. Shower Pan Test
Plug the drain, fill the base with water (without turning on the shower), and leave it for 24 hours. If water disappears, the pan is leaking.
3. Dye Test
Add food colouring to the water in the drain or tank. If colored water shows up elsewhere (e.g., the downstairs ceiling), you’ve found a leak.
4. Use a Moisture Meter
A moisture meter can detect damp areas behind tile or drywall. This tool is often used by professionals.
5. Remove Access Panels or Drywall
Carefully remove drywall or use an existing access panel behind the shower to inspect the plumbing and look for leaks.
Also Read: Maintain Your Home’s Sewer Line and Avoid Costly Repairs: How to Do It
Picture Source – Delta Plumbers
How Do I Make My Shower Leak-Proof?
Preventing future leaks requires a combination of quality materials, proper installation, and ongoing maintenance.
1. Use Waterproof Backer Board and Membrane
Behind your tile, there should be a cement-based backer board and a waterproof membrane to keep water out of the wall cavity.
2. Seal All Joints with Silicone
Use flexible, waterproof silicone caulk around all corners, seams, and between fixtures and the wall.
3. Install a Properly Sloped Shower Floor
The floor should slope at least ¼ inch per foot toward the drain. This prevents standing water and seepage.
4. Use High-Quality Fixtures
Invest in reliable, leak-proof valves and fittings with solid warranties.
5. Check and Replace Grout and Caulk Annually
Even with good materials, grout and caulk degrade. Check for wear and reseal as needed.
6. Install a Shower Splash Guard or Magnetic Door Seals
These additions keep water where it belongs—inside the shower.
Also Read: Professional Faucet Repair is Better Than DIY Solutions: Why?
Picture Source – Delta Plumbers
How Much Does It Cost to Repair a Leaky Shower Faucet?
Repair costs vary widely depending on the severity of the issue and whether you hire a professional or DIY. Below is a cost breakdown:
| Repair Type | Average Cost (CAD) | Details |
| Replace Washers or O-rings | $75 – $200 | Basic repair, parts are inexpensive, and can be DIY |
| Replace Cartridge | $150 – $350 | Moderate job, cartridge cost varies by brand |
| Valve Body Replacement | $300 – $800 | Involves removing tiles or drywall, a professional job |
| Showerhead or Shower Arm Replacement | $80 – $200 | Quick and simple, costs depend on fixture type |
| Leak Detection + Repair | $200 – $1,000+ | If the leak is hidden in the walls or floor, professional leak detection is required |
| Complete Faucet Replacement | $350 – $600 | Includes fixture and labour, may be more if high-end fixtures are used |
Pro Tip: In Ontario, always get a quote from a licensed plumber. Delta Plumbers offers transparent pricing and free estimates!
Conclusion –
Shower leaks can start as minor nuisances and escalate into major repairs if ignored. Whether it’s a faulty valve, a cracked shower pan, or deteriorating grout, identifying the root cause early is key to avoiding water damage and costly renovations.
🔧 If you’re confident with DIY repairs, start with the basics—grout, caulk, and seals.
👷 If the leak is hidden or structural, don’t risk further damage—call Delta Plumbers.
💧 Our expert team is available across Ontario to inspect, repair, and protect your plumbing system.
Proudly Serving Ontario’s Communities 🚰🛠️
Delta Plumbers delivers expert plumbing solutions across Ontario. From faucet repairs to full system overhauls, we’ve got you covered in:
We also serve areas like North York, Orangeville, Woodstock, Guelph, Quinte West, Markham, Kleinburg, Fort Erie, Hamilton, Brantford, and more.
