Replacing a showerhead might seem like a daunting plumbing task reserved for professionals, but in reality, it’s a job you can often do in just a few minutes. Whether you’re upgrading to a high-pressure showerhead, switching to a water-saving model, or simply replacing a worn-out unit, understanding how to replace a showerhead can save you time, money, and frustration.
In this detailed guide, Delta Plumbers walks you through every aspect of replacing a showerhead—from how long it takes, how easy it is, and what to do if your old showerhead won’t budge. We’ll also explore whether you need to turn off the water, the average cost of hiring a plumber for the job, and how long a typical showerhead lasts.
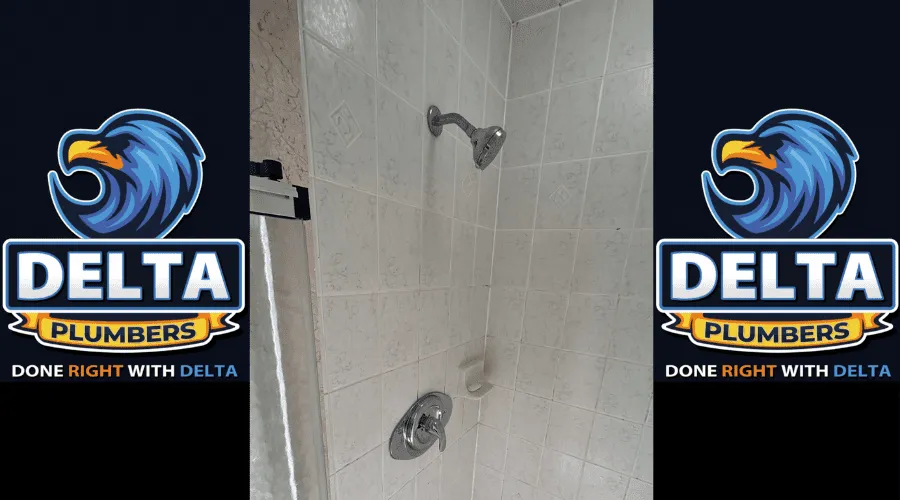
Picture Source – Delta Plumbers
How Long Does It Take to Replace a Showerhead?
One of the most frequently asked questions homeowners have is, “How long does it take to replace a showerhead?” Fortunately, the answer is very reassuring.
In most cases, you can replace a showerhead in 10–15 minutes, even if you’re a complete beginner. If the old showerhead comes off easily and the threads are in good shape, it might take as little as 5 minutes. If there’s corrosion, scale buildup, or thread damage, it might take a bit longer.
Time Breakdown for Typical Showerhead Replacement:
- Removing old showerhead: 2–5 minutes
- Cleaning pipe threads: 1–2 minutes
- Applying plumber’s tape (Teflon tape): 1 minute
- Installing new showerhead: 2–5 minutes
- Testing for leaks and adjustments: 1–3 minutes
Things That Might Add Time:
- Stuck or rusted showerhead
- Damaged pipe threads
- Needing to use penetrating oil or tools
- Replacing with a dual-head or handheld shower combo
So, if you have the right tools on hand (adjustable wrench, pliers, Teflon tape), replacing your showerhead is not just fast—it’s satisfying.
Also Read: Copper vs PEX Pipes: What’s Best for Your Home in 2025?
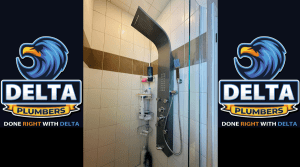
Picture Source – Delta Plumbers
How Easy Is It to Replace a Showerhead?
When it comes to home maintenance, some tasks require professional intervention. But replacing a showerhead is one of the easiest DIY plumbing tasks you can tackle.
Why It’s So Easy:
- No complex tools needed: Most showerheads can be installed using just hand-tightening or a wrench.
- No need to cut pipes or access walls: The work happens externally on the shower arm.
- Universal threading: Most shower arms in Canada and the U.S. have standard 1/2-inch NPT threads, making compatibility simple.
Steps Involved:
- Unscrew the old showerhead (counter-clockwise).
- Clean off any debris or old plumber’s tape.
- Wrap fresh Teflon tape around the threads.
- Screw on the new showerhead clockwise.
- Turn on the water to test for leaks.
Even Easier with Tool-Free Options:
Some modern showerheads are designed to be hand-tightened—no tools required. This makes it even simpler for homeowners, renters, and seniors.
That said, if you encounter a stuck or rusted unit or if your shower arm is damaged, it’s a good idea to contact a licensed plumber like Delta Plumbers to avoid making things worse.
Also Read: How to Temporarily Fix a Burst Pipe While Waiting for Help

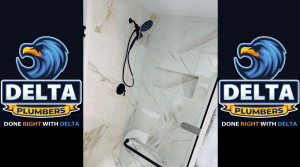
Picture Source – Delta Plumbers
Do I Have to Shut Off the Water to Change a Shower Head?
Another common question is whether you need to shut off your home’s water supply before replacing a showerhead. The answer: No, you usually don’t.
Why You Don’t Need to Shut Off the Main Water:
- Showerheads connect to your shower valve, not directly to the main line.
- As long as the shower is turned off at the faucet or valve, no water will come out.
- Most modern showers are equipped with single- or dual-handle valves that prevent water flow when not in use.
When You Should Shut Off Water:
- If your shower valve is malfunctioning and water continues to drip even when “off.”
- If you’re replacing more than just the showerhead, such as the shower arm or internal plumbing.
- If you’re unsure of how your plumbing system is laid out, and want to be cautious.
For most standard installations, you can safely swap the showerhead without turning off the main water supply. Just ensure the valve is off and there’s no pressure in the line.
Also Read: How to Install a Toilet Flange in 8 Steps: A Complete DIY Guide for Homeowners

Picture Source – Delta Plumbers
How Much Does a Plumber Charge to Install a Shower Head?
While replacing a showerhead is often a DIY job, some people prefer to have a professional handle it, especially if they’re installing a luxury model, a complex dual shower system, or if there are signs of corrosion or leaking.
Average Cost of Showerhead Installation by a Plumber:
- Basic replacement: $75–$150
- Upgrading to dual or handheld systems: $150–$250
- Wall-mounted rain shower or customized units: $250+
Factors That Affect Cost:
- Type and complexity of the new showerhead
- Time required (e.g., stuck parts or rusted pipe)
- Whether the shower arm or valve needs replacing
- Travel fees (especially for rural areas)
- Emergency or same-day service requests
If you’re in Ontario, Delta Plumbers offers flat-rate pricing and same-day service, so you don’t have to worry about hidden charges. We’ll remove your old showerhead, inspect the threads, install the new unit, and ensure leak-free performance—all backed by warranty.
Also Read: How to Turn Off a Water Heater in 5 Steps: A Complete Ontario Homeowner’s Guide

Picture Source – Delta Plumbers
Can I Replace a Showerhead Myself?
Yes, you absolutely can. If you have basic tools and a little patience, replacing a showerhead yourself is both cost-effective and rewarding.
Here’s What You’ll Need:
- New showerhead (choose one that matches your water pressure needs)
- Adjustable wrench or pliers (if needed)
- Teflon tape (also known as plumber’s tape)
- Old rag or towel
- Optional: Penetrating oil (like WD-40) for stubborn threads
DIY Installation Steps:
1. Remove the Old Showerhead
Use your hand or a wrench. If it’s tight, wrap a towel around the connector to avoid scratching it with your tool.
2. Clean the Shower Arm Threads
Remove any leftover Teflon tape or debris using a cloth.
3. Apply New Teflon Tape
Wrap 2–3 turns of tape clockwise around the threads.
4. Install the New Showerhead
Hand-tighten first. Use a wrench only if necessary—and don’t overtighten.
5. Check for Leaks
Turn the water on slowly. If there’s any leakage, tighten gently and reapply tape if needed.
If at any point you feel unsure or notice damaged parts, Delta Plumbers is just a phone call away for professional, affordable help.
Also Read: What Is a Sump Pump, and Do You Need One?

Picture Source – Delta Plumbers
What Is the Lifespan of a Shower Head?
While showerheads aren’t often thought about until they break or clog, they do have a typical lifespan that can affect water pressure and hygiene.
Average Lifespan:
- Basic models: 6–10 years
- High-end models: 10–15 years
- Hard water areas: 4–6 years (due to mineral buildup)
Signs It’s Time to Replace:
- Reduced water pressure or uneven spray
- Limescale or rust buildup
- Mould or mildew around the head
- Plastic cracking or internal leaks
Regular cleaning (with vinegar or descaling agents) can extend the life of your showerhead, but eventually, parts degrade. Modern water-saving models not only improve performance but also help lower water bills, making a replacement a smart, long-term move.
Also Read: Drain Clearing vs. Drain Cleaning: What’s the Difference and Why It Matters

Picture Source – Delta Plumbers
Why Can’t I Remove My Shower Head?
If your old showerhead refuses to budge, you’re not alone. This is one of the most common issues homeowners face during replacement.
Common Reasons for a Stuck Showerhead:
1. Corrosion: Especially in older homes with iron pipes or hard water.
2. Limescale Buildup: Minerals can act like cement over time.
3. Overtightened Connector: If it was cranked too hard during installation.
4. Worn Threads or Cross-Threading: Causing mechanical lock-up.
How to Remove a Stuck Showerhead:
- Step 1: Apply Penetrating Oil
Spray WD-40 or a similar product at the base. Let it sit for 10–15 minutes. - Step 2: Use the Right Tool
Grip with an adjustable wrench. Wrap with a cloth to avoid damaging the finish. - Step 3: Apply Gentle Pressure
Wiggle slightly and rotate counter-clockwise. Avoid yanking hard—this can snap the pipe. - Step 4: Use Heat (Optional)
A hair dryer or heat gun can expand the metal slightly and loosen rust bonds.
If these steps don’t work—or if the pipe starts to flex—it’s time to call in Delta Plumbers. We’ll safely remove the old unit without damaging your plumbing or tiles.
Final Thoughts: Call Delta Plumbers for Showerhead Services in Ontario
Whether you’re a DIY enthusiast or prefer professional help, replacing your showerhead doesn’t have to be stressful. With a bit of knowledge, the right tools, and attention to detail, you can enjoy a stronger, cleaner, and more water-efficient shower experience.
But if things go wrong—if the showerhead is stuck, leaking, or causing water pressure issues—Delta Plumbers is here to help. We serve homeowners across Ontario with same-day service, licensed professionals, and transparent pricing. From replacing simple showerheads to installing dual systems and fixing corroded pipes, we do it all.
Ontario Plumbing Solutions You Can Rely On 🛠️🚰
At Delta Plumbers, we’re committed to delivering top-notch plumbing services throughout Ontario. Whether it’s a faucet replacement or a major repair, our skilled technicians are ready to help. We proudly serve homeowners in:
We also operate in many other cities across the province, including Toronto, Mississauga, Vaughan, Kitchener, Waterloo, Barrie, Kingston, London, and more.
Wherever you’re located in Ontario, Delta Plumbers is just a call away for fast, reliable, and affordable plumbing service.
